
Getting Started
Now that you have installed Apigility, it's time to visit it.
Assumptions
This chapter assumes you are running per the installation guide, and the
application root is available at the URL http://localhost:8080/.
Note: File System Permissions
The Apigility Admin UI writes to the application's filesystem, specifically in the
module/andconfig/directories. As such, the user under which the web server runs must have permissions to write to those directories and to files inside those directories. Apigility contains some logic to detect if permissions are not set correctly, and will raise an warning dialog if it detects this situation. If you see such a dialog, use your operating system tools to set the file system permissions accordingly.When deploying an Apigility-based application, however, you do not need write permissions to these directories; you only need the write permissions during development.
First Steps
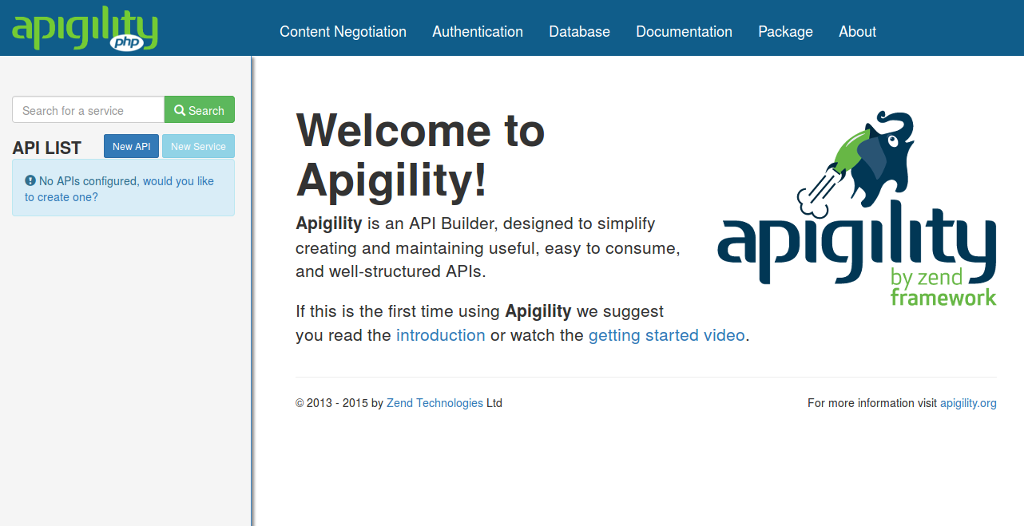
Visit the url http://locahost:8080/, which will look like this:
Create an API
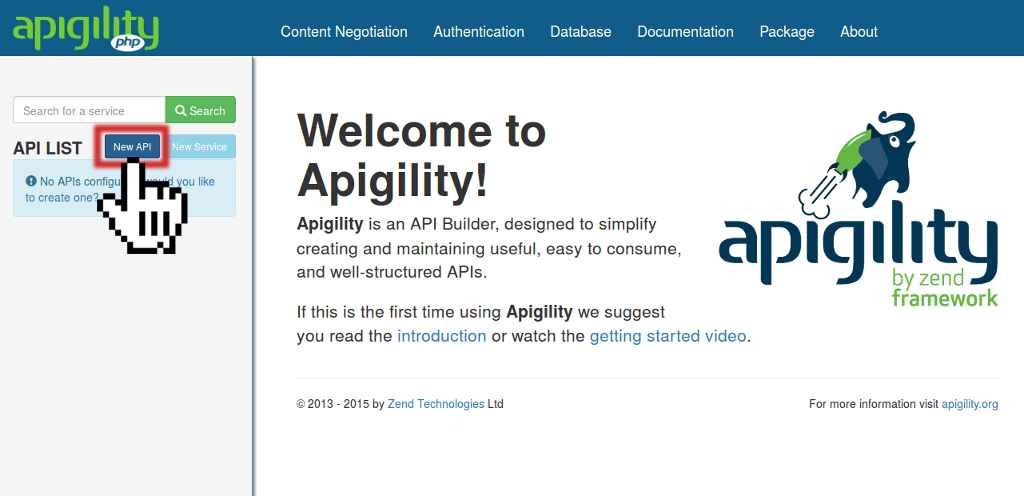
Now it's time to create your first API. Click the "New API" button on the sidebar of the screen:
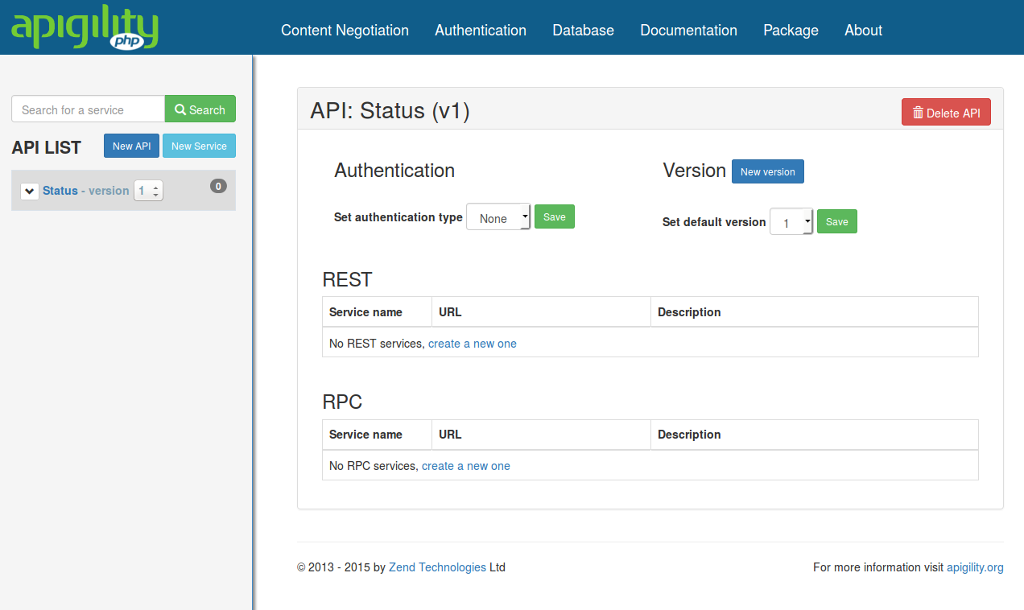
For this exercise, we'll create an API called "Status"; type that for the "API Name", and press the "Create" button. When it completes, you'll be taken to an API overview screen:
Create an RPC Service
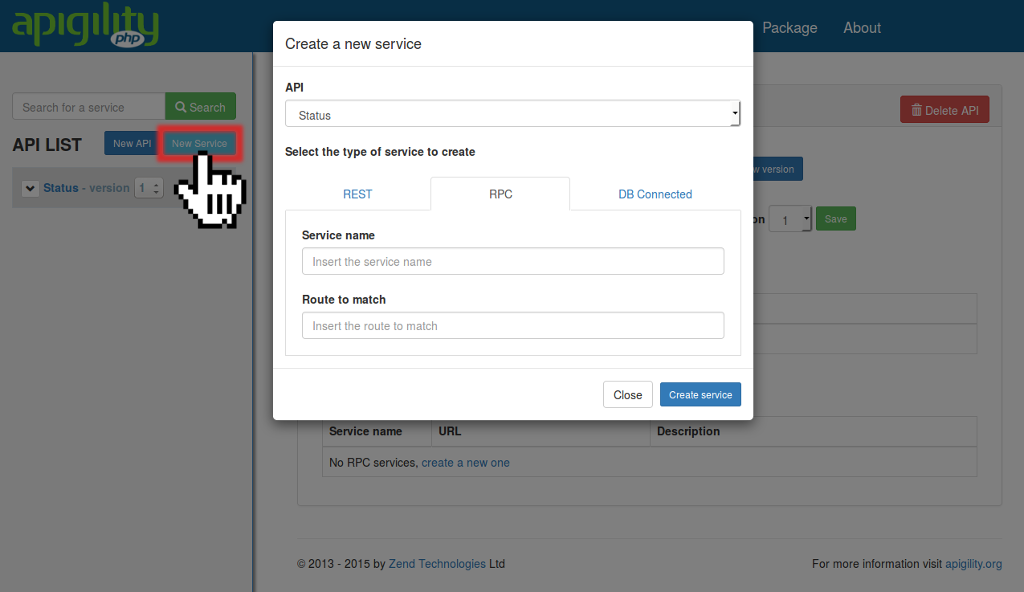
Now we'll create our first service. Click on the button "New Service" and select the "RPC" tab in the modal window:
Provide the value "Ping" for the "Service name", and the value "/ping" for the "Route to match"; then click the "Create service" button to create the service.
Once created, you will see a page like that:
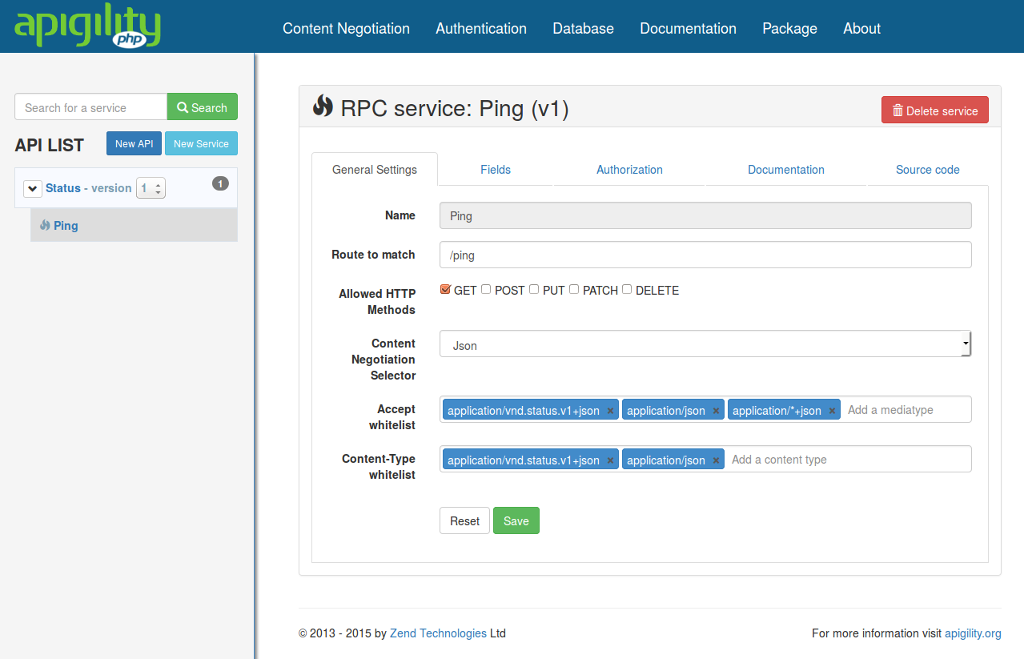
The defaults for this RPC service will work fine for us. However, let's document it a bit.
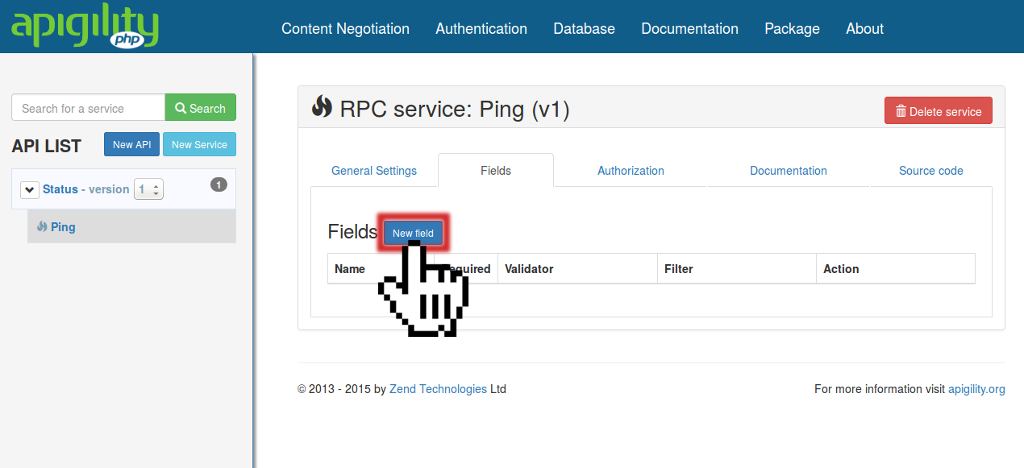
Click the "Fields" tab and then click to "New field" button as reported here:
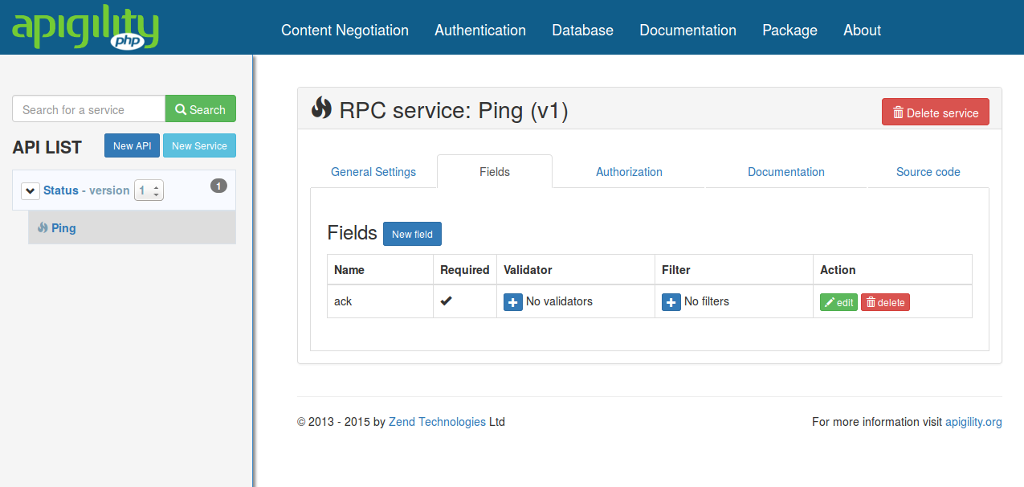
Enter the value "ack" for the "Name" and the value "Acknowledge the request with a timestamp" in the "Description" field. Finally click click the "Save" button. You will see the "ack" field in the list of fields now.
Right now, our service does nothing. Let's change that.
Open the file module/Status/src/V1/Rpc/Ping/PingController.php, and edit it so that it
looks like the code reported below:
namespace Status\V1\Rpc\Ping;

use Zend\Mvc\Controller\AbstractActionController;
use ZF\ContentNegotiation\ViewModel;

class PingController extends AbstractActionController
{
    public function pingAction()
    {
        return new ViewModel([
            'ack' => time()
        ]);
    }
}
The important pieces are the import of the ZF\ContentNegotiation\ViewModel class, and the
usage of ViewModel object in the pingAction method.
Controllers and View Models
A controller is code that receives an incoming request, and determines what code to delegate to to perform operations, and then communicates to the view information on what to render.
A view model is a value object that contains data that we want to return in the representation provided in the response.
In this code, we are saying that the response should contain an ack member with the current
timestamp.
Testing our RPC Service
Now it's time to test the RPC service. You can do this with any tool capable of communicating over HTTP. Some favorites of ours include:
- Postman for the Chrome web browser.
- RESTClient for Firefox, Chrome, and Safari.
- cURL, the venerable and ubiquitous command line tool.
- HTTPie, a "cURL-like tool for humans"; think of it as cURL with built-in syntax highlighting and simplified request syntax.
In the documentation, we will show requests using actual HTTP requests and responses.
Let's perform a GET request to the service, and specify we want HTML:
GET /ping HTTP/1.1
Accept: text/html
This will return an error:
HTTP/1.1 406 Not Acceptable
Content-Type: application/problem+json

{
    "detail": "Cannot honor Accept type specified",
    "status": 406,
    "title": "Not Acceptable",
    "type": "http://www.w3.org/Protocols/rfc2616/rfc2616-sec10.html"
}
Apigility defaults to JSON. If you specify a different media type in the
Accept header, it reports that it cannot handle it. (You can configure your service later to
handle other media types, however.)
Now, let's try requesting JSON:
GET /ping HTTP/1.1
Accept: application/json
This will work!
HTTP/1.1 200 OK
Content-Type: application/json

{
    "ack": 1396560875
}
Now let's try a POST request:
POST /ping HTTP/1.1
Accept: application/json
Content-Type: application/json

{ "timestamp": 1396560875 }
Apigility reports:
HTTP/1.1 405 Method Not Allowed
Allow: GET
Apigility takes care of HTTP method negotiation for you. This means if a request is made via a
method you have not allowed, it will report this to the user with a 405 status code, and also
report which methods are allowed via the Allow response header.
You can also ask Apigility which methods are allowed via the OPTIONS request:
OPTIONS /ping HTTP/1.1
will respond with:
HTTP/1.1 200 OK
Allow: GET
Congratulations! You've created your first API and first service!